


いくら検索しても見つからなかったCentOS Stream 9(kusanagi9.3.2308)のルートパーティション(/dev/sda1) が拡張できたので、今回はその覚え書きとなります。
VMware上でディスクを拡張する
はじめにVMwareでディスクを拡張します。
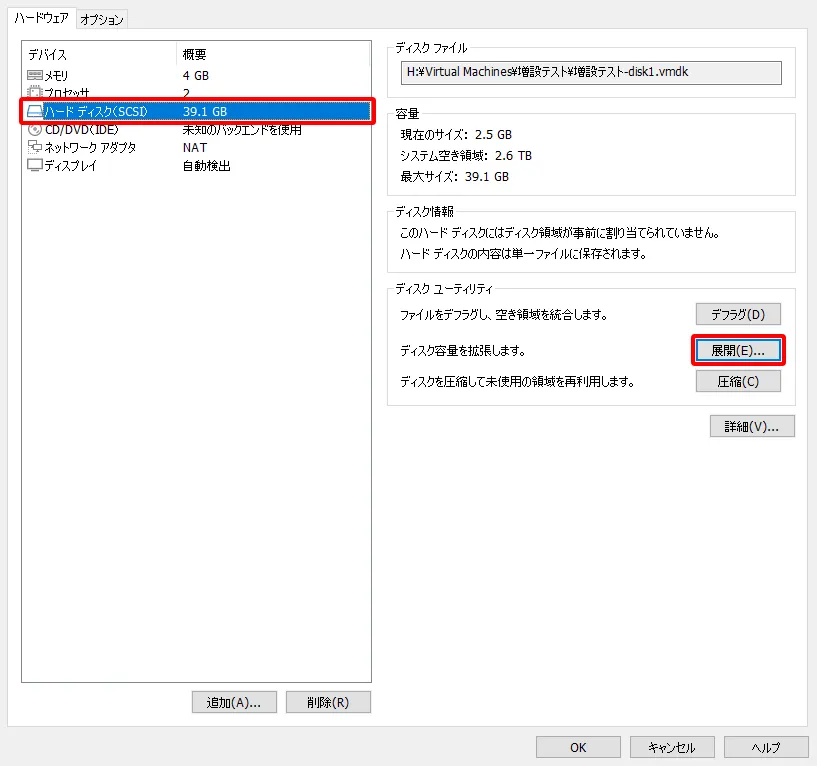
ハードディスクを選択して「展開」をクリックします。
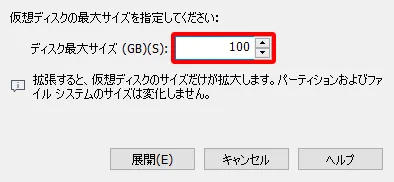
拡張したいサイズを入力して「展開」をクリックします。
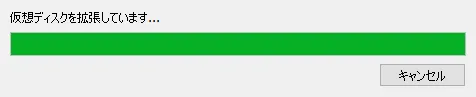
拡張中です。容量によっては数分待つこともあります。
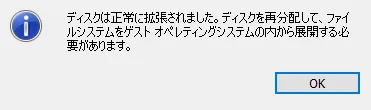
拡張完了です。
このあとはシステムを起動して、OS上で拡張設定をしていきます。
OS上でディスクを拡張する
ディスクの空き容量を調べる
# df -h

Filesystem       Size Used Avail Use% Mounted on
devtmpfs         4.0M    0  4.0M   0% /dev
tmpfs            1.8G    0  1.8G   0% /dev/shm
tmpfs            730M  18M  713M   3% /run
/dev/sda1         39G  33G  6.4G  84% /
tmpfs            365M    0  365M   0% /run/user/0
#
パーティションの状態を調べる
# fdisk -l
Disk /dev/sda: 100 GiB, 107374182400 bytes, 209715200 sectors
Disk model: VMware Virtual S
Units: sectors of 1 * 512 = 512 bytes
Sector size (logical/physical): 512 bytes / 512 bytes
I/O size (minimum/optimal): 512 bytes / 512 bytes
Disklabel type: dos
Disk identifier: 0x88efb32b

Device    Boot Start      End  Sectors  Size Id Type
/dev/sda1    *  2048 81919999 81917952 39.1G 83 Linux
#
fdiskで一度パーティションを削除する
# fdisk /dev/sda

Welcome to fdisk (util-linux 2.37.4).
Changes will remain in memory only, until you decide to write them.
Be careful before using the write command.

This disk is currently in use - repartitioning is probably a bad idea.
It's recommended to umount all file systems, and swapoff all swap
partitions on this disk.

Command (m for help): p

Disk /dev/sda: 100 GiB, 107374182400 bytes, 209715200 sectors
Disk model: VMware Virtual S
Units: sectors of 1 * 512 = 512 bytes
Sector size (logical/physical): 512 bytes / 512 bytes
I/O size (minimum/optimal): 512 bytes / 512 bytes
Disklabel type: dos
Disk identifier: 0x88efb32b

Device Boot Start End Sectors Size Id Type
/dev/sda1 * 2048 81919999 81917952 39.1G 83 Linux

Command (m for help): d
Selected partition 1
Partition 1 has been deleted.

Command (m for help):
削除したバーティションを再作成する
Command (m for help): n
Partition type
p primary (0 primary, 0 extended, 4 free)
e extended (container for logical partitions)
Select (default p): p
Partition number (1-4, default 1): 1
First sector (2048-209715199, default 2048):
Last sector, +/-sectors or +/-size{K,M,G,T,P} (2048-209715199, default 209715199):

Created a new partition 1 of type 'Linux' and of size 100 GiB.
Partition #1 contains a xfs signature.

Do you want to remove the signature? [Y]es/[N]o: y

The signature will be removed by a write command.

Command (m for help): w
The partition table has been altered.
Syncing disks.

#
システムを再起動する
# reboot
ファイルシステムをリサイズする
# xfs_growfs /dev/sda1

meta-data=/dev/sda1 isize=512 agcount=4, agsize=2559936 blks
= sectsz=512 attr=2, projid32bit=1
= crc=1 finobt=1, sparse=1, rmapbt=0
= reflink=1 bigtime=1 inobtcount=1 nrext64=0
data = bsize=4096 blocks=10239744, imaxpct=25
= sunit=0 swidth=0 blks
naming =version 2 bsize=4096 ascii-ci=0, ftype=1
log =internal log bsize=4096 blocks=16384, version=2
= sectsz=512 sunit=0 blks, lazy-count=1
realtime =none extsz=4096 blocks=0, rtextents=0
data blocks changed from 10239744 to 26214144
#
OS内でディスク使用領域が拡張されているか確認する
# df -h

Filesystem       Size  Used Avail Use% Mounted on
devtmpfs         4.0M     0  4.0M   0% /dev
tmpfs            1.8G     0  1.8G   0% /dev/shm
tmpfs            730M   18M  713M   3% /run
/dev/sda1        100G   34G   67G  34% /
tmpfs            365M     0  365M   0% /run/user/0
You have new mail in /var/spool/mail/root
#
以上となります。
もしかして当たり前すぎて誰も記事にしなかったのかと思うくらい、やってみるとあっけないほど簡単な作業でした。
調べてはあれも違うこれも違うと頭を悩ませられましたが、何はともあれ無事に拡張できて良かったです。
VMware 上で kusanagi9 を実装する際、ハードディスクの初期容量は39.1GBしかないので、アップグレードや kusanagi9 の展開、プロビジョン、プレミアムエディション実装と進めていくと、残りはほんの1.1GB程度になってしまい、日々の yum update ですら容量不足で実行できなくなってしまいます。
ですので、VMware 上で kusanagi9 を構築する際には、 dnf upgrade や kusanagi init を実行する前にこの作業をやっておきたいですね。
それではお疲れ様でした。


コメント